How to Set up Network Solutions to Outlook?
Having problems setting up your Network email account in Outlook, then this article will help you. In this, we discuss why users want to setup Network Solutions to Outlook and provide two methods to help them.
Network Solutions, a subsidiary of Web.com, is a US-based technology company that provides various web services like web hosting, web design, and online marketing. In addition, Network Solutions also offers professional email services to individuals and businesses. It’s a paid email facility where users create their email account using their own domain name. However, some users want to setup Network Solutions email in Outlook.
Reasons Behind to Add Network Email Solutions to Outlook
Not just the price of Network Solutions email; many other reasons are, where users want to setup their Network Solutions.
- The first reason is that Network Solutions email has less security features than Outlook.
- Outlook is a free email program available on various platforms.
- Network solutions provide fewer features compared to Outlook.
- It is very easy in Outlook to quickly search your emails, for example, dates, calendars, contacts, etc. but in Network solutions there is no such thing.
With all these reasons, we understand Outlook is a better email program than Network Solutions email. Now, to add the Network email account in Outlook,there are some methods you can use.
Methods to Setup Network Solutions to Outlook
Network Solutions email has one amazing feature: it is compatible with POP3 or IMAP email clients. Similarly, Outlook also supports POP3/IMAP email accounts. Therefore, we are going to use an IMAP account to setup the accounts. It’s a free-to-use method, but it’s a long process and difficult for non-technical users. To overcome these limitations, you can use a software method to transfer Network emails to Outlook. The method is simple, and both technical and non-technical users can easily use the software without any issues. Hence, there are two types of methods you can use to set Network Solutions email to Outlook.
- Manual method: Add your Network Solutions email account in Outlook using POP3 or IMAP.
- Professional method: Here, we use software to add Network email solutions to Outlook.
Manual Way to Set Network Solutions Email Settings in Outlook
In this method, we add our Network email account to Outlook using an IMAP account. Follow the steps given below carefully to avoid any problems during the process.
- Open MS Outlook on your computer and click the File option.
- Click on the Add Account option and type your Network Solutions email address. Click the Advance option and then “Let me setup my account manually“. Press the Connect option.
- Now, select IMAP account type and enter incoming mail: mail.(your domain name).com, port: 993, and encryption method: SSL.
- If you choose without SSL encryption method, select 143 as the IMAP port.
- Outgoing mail: mail.(your domain name).com, port: 587, and encryption method: SSL.
- After that, click on both the Require logon using Secure Password Authentication (SPA) checkbox and the Next button.
- Enter your Network Solution email password and click Connect.
After clicking Connect, Outlook starts setting up your Network Solutions account, and once it’s done, it will notify you.
Limitations of the Manual Method
The method is free; however, there are some flaws in it.
- The method is a lengthy and time-consuming process.
- Chances are that you cannot add Network Solutions to Outlook.
- It is complicated for non-professional users.
- Any disturbances during the process can lead to the loss of data.
- You need good knowledge of configuring the account.
Due to these drawbacks, the manual method is not a good way to transfer Network emails to Outlook. That’s why you can use another method to migrate your emails.
Professional Method to Setup Network Solutions to Outlook
To transfer Network email accounts to Outlook without any problems, use the DataSkorpio Email Backup Wizard. This software easily retrieves data from the Network account and exports it to Outlook. In this way, you don’t need to physically import your Network emails into the software. Because once you add your account, the software automatically fetches the data. In addition to exporting the emails, the software also has other features.
Amazing Features of the Software
- The main feature of the software is that it exports emails into other file formats like OST, EML, MBOX, PDF, etc.
- It allows users to extract attachments, phone contacts, images, email addresses, etc.
- Users preview their files in various modes like Content, HEX, etc.
- The software maintains file and folder hierarchy during the process.
- You can name your files before exporting them.
Steps to Setup Network Solutions to Outlook Using Software
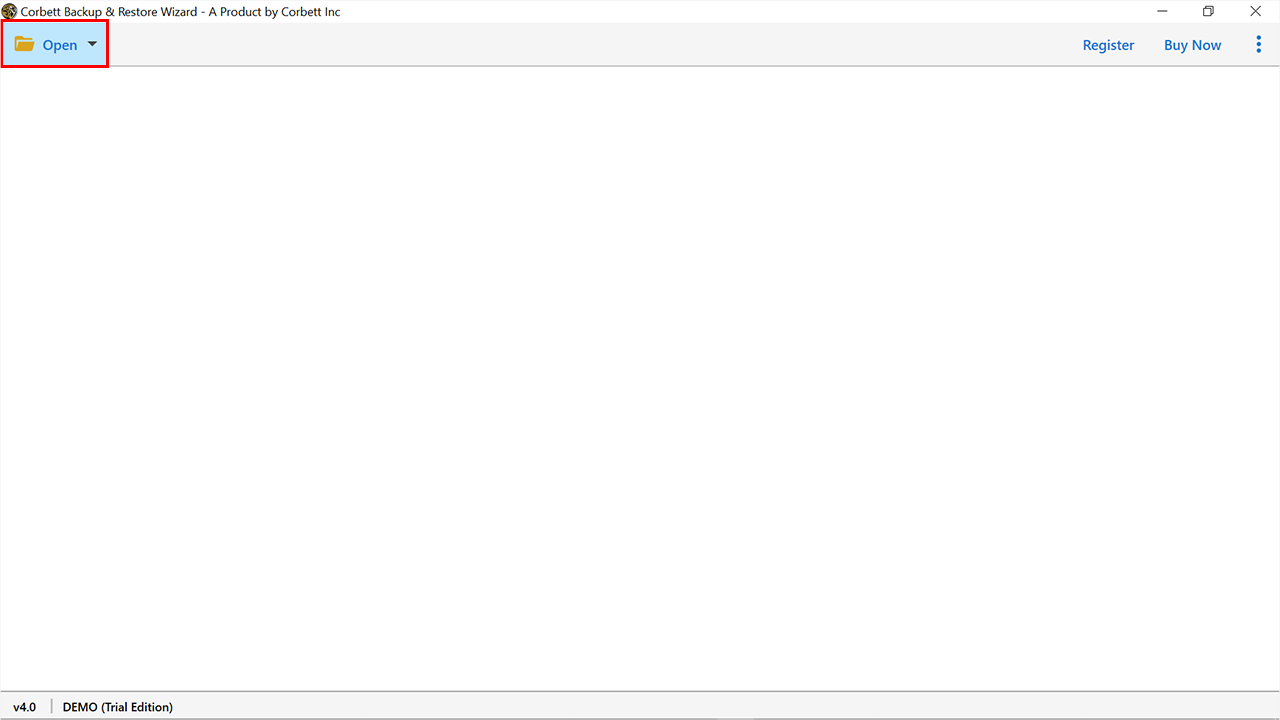
- Download and install the software. After that, click the Open option.
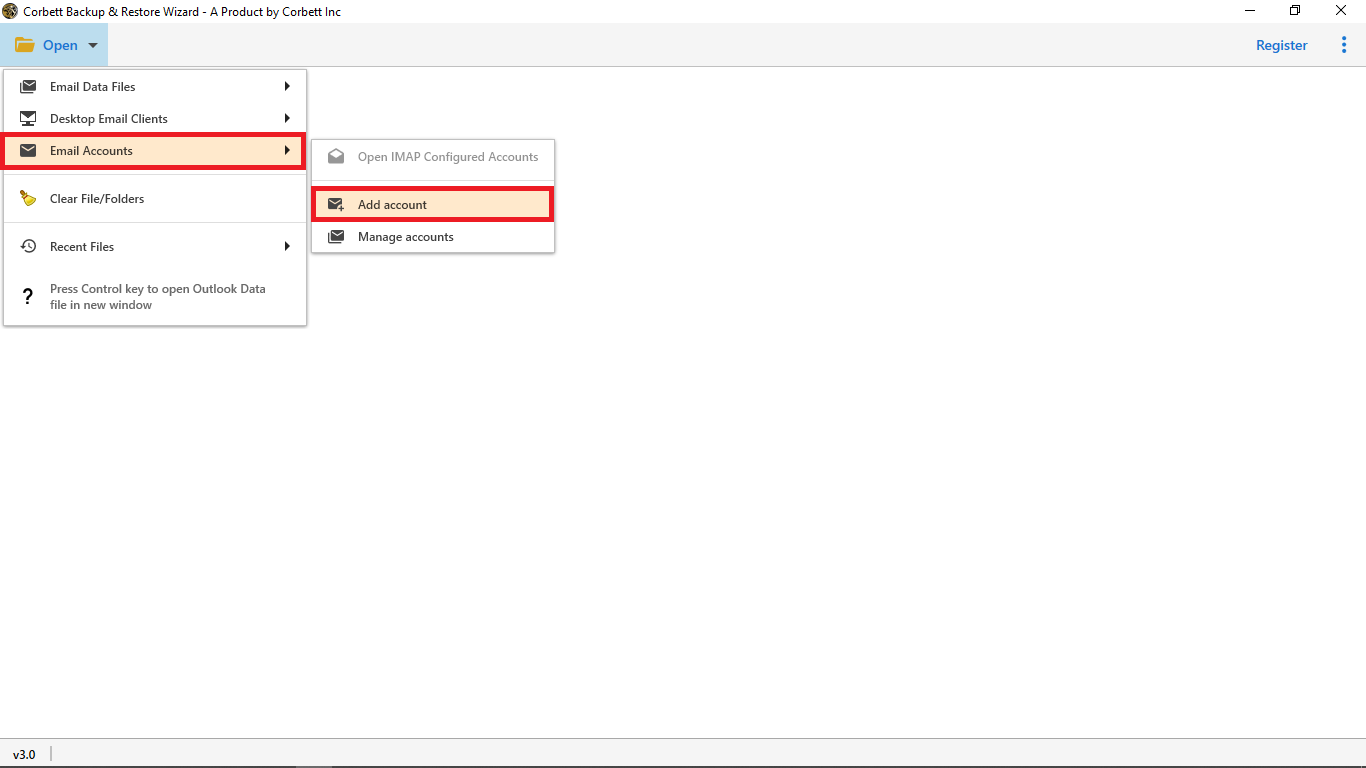
- Select Email Account, then click on Add Account.
- Now, enter Network Solutions email account details and click on the Add button.
- After clicking, the software fetches your data from the Network Solutions email and displays it to you. Preview your data.
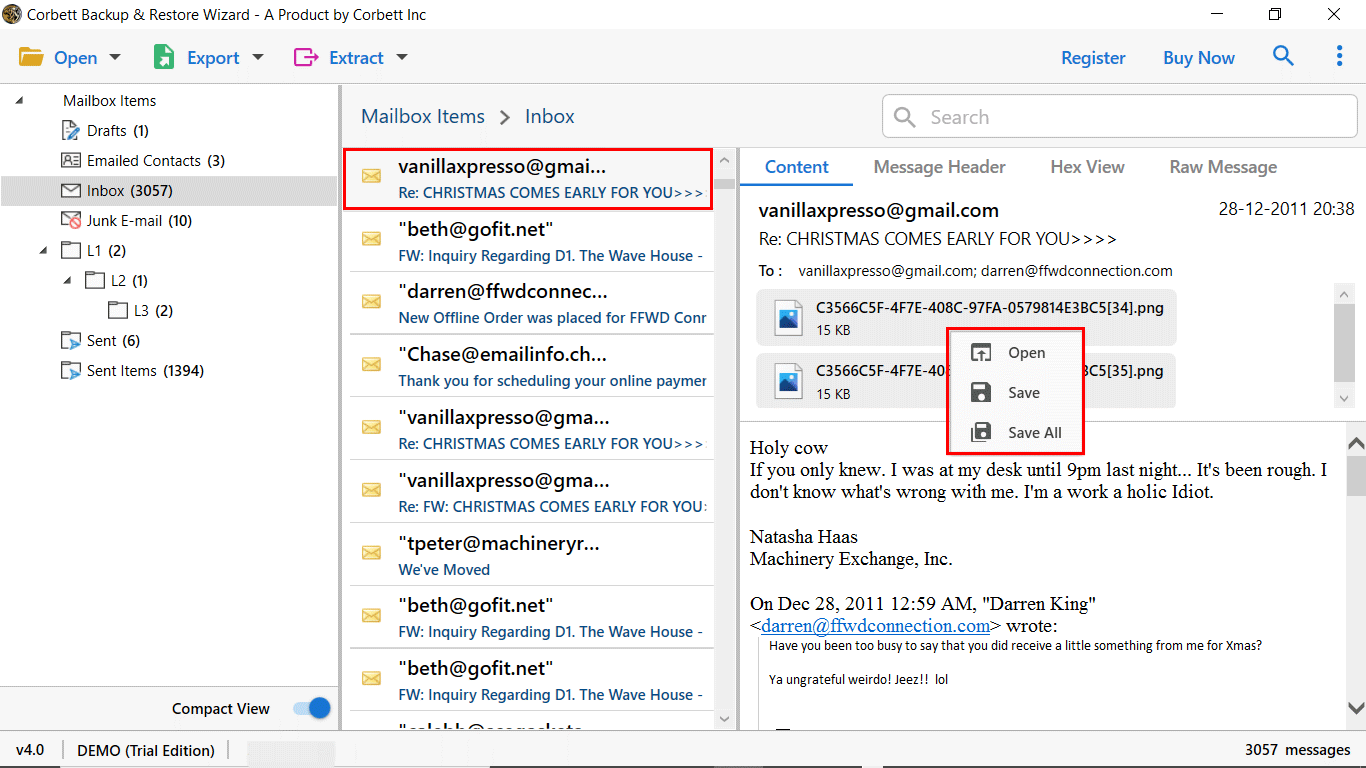
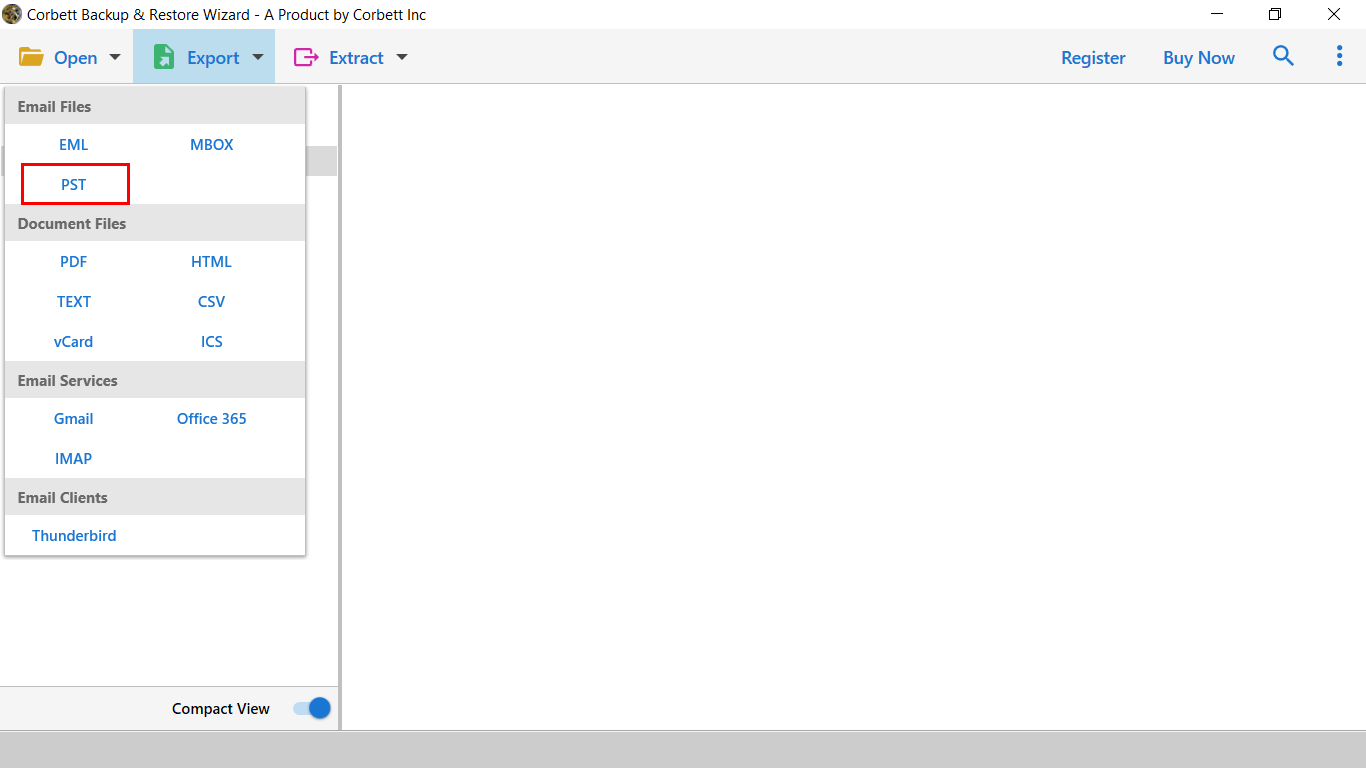
- Click on the Export option and select PST. Click on the Browse button to set a location for your files.
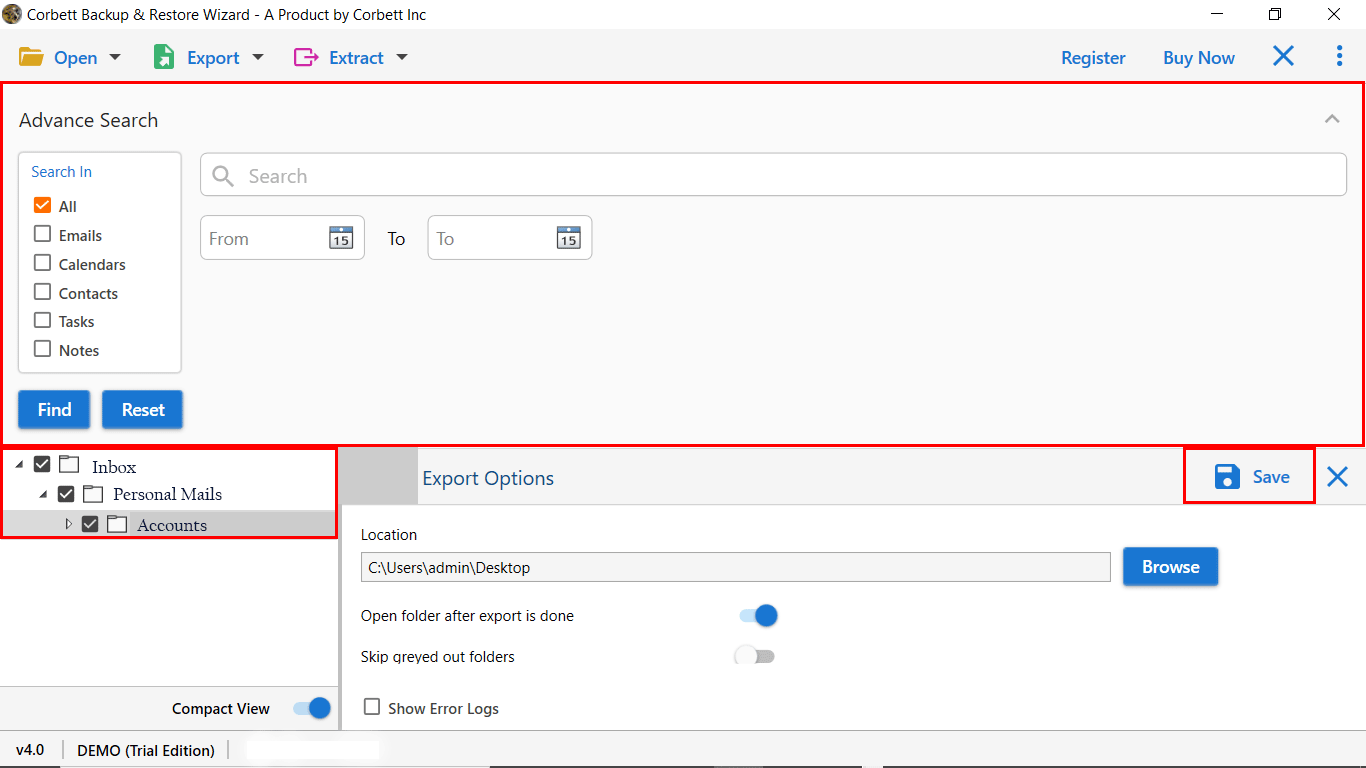
- After that, click on Advance search option and select option whih cyou want and then the Save button.
Conclusion
There are various reasons a user wants to add Network email solutions to Outlook. That’s why, in this article, we discuss two methods that you can use to setup the account. The methods are: setup Network Solutions to Outlook via IMAP, and use software to export Network Solutions emails into PST format. Both methods are good on their own; however, if you want a fast and reliable solution, software is the best choice. Due to its easy-to-use interface and amazing features.
Read more: How to change Hotmail to Outlook?
